Start from Zero
This article will describe how to quickly create a Planar Image Tracking AR application using EasyAR Sense Unity Plugin.
Preparation
Prepare Unity Environment
Read Platform Requirements to learn system and Unity versions EasyAR Sense Unity Plugin support and get Unity packages from the Unity website.
If it is your first time, suggest using LTS Releases from Unity.
Prepare Package
Get latest EasyAR Sense Unity Plugin package from download page.
Get Licensing
Before using EasyAR Sense, you need to register on www.easyar.com and get a license key .
Create Project
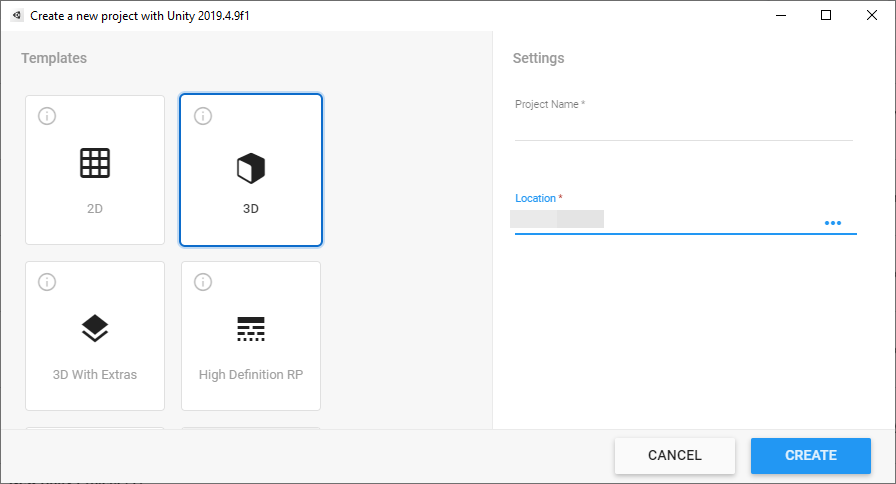
Create Empty Unity Project
Choose 3D template When create a project. EasyAR do not support Scriptable Render Pipeline like Universal Render Pipeline by default in this version.
Add Plugin Package
Extract the downloaded zip file, use Unity’s Package Manager window to install the plugin from a local tarball file.
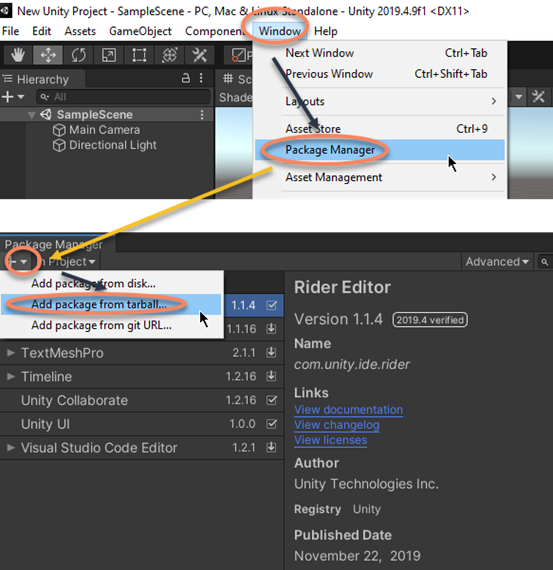
Choose the com.easyar.sense-*.tgz file in the popup dialogue.
NOTE: The tgz file cannot be deleted or moved to another place after import, so it is always a good practice to find a suitable place for the file before import. If you want to share the project with others, you can put the file inside the project and your version control system.
Fill in License Key
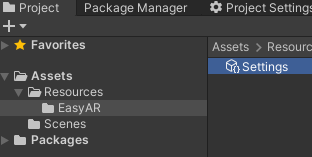
Choose <EasyAR -> Sense -> Configuration> from Unity menu and fill in the License Key in the Inspector.

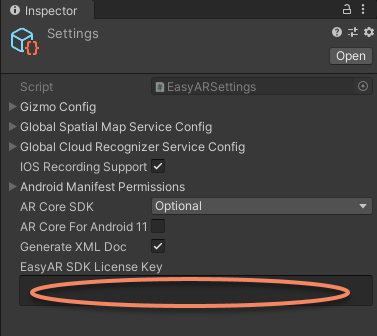
This will create an asset in your Assets folder, do not move or delete it.
Edit Scene
Create Scene
Create a scene or use the automatically created scene by the project and ensure there is a Camera and light in the scene.
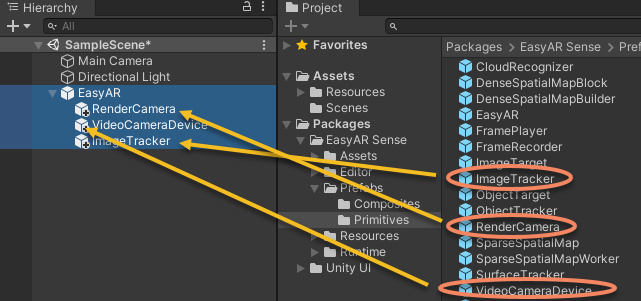
Add ARSession into the Scene
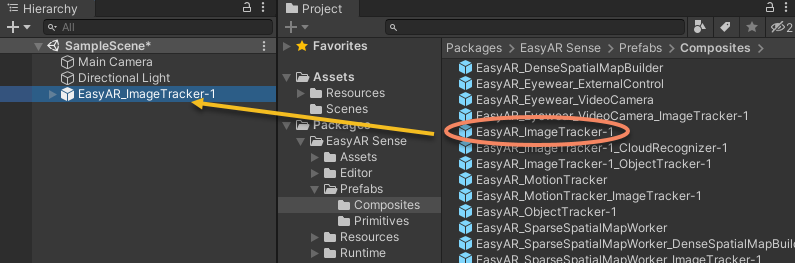
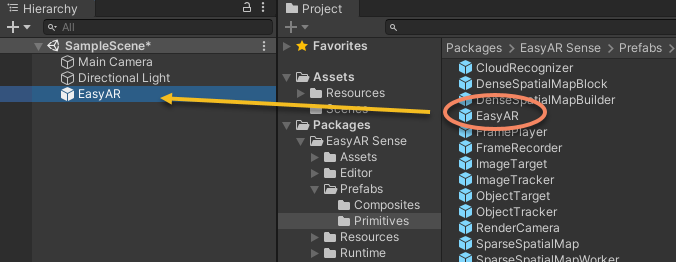
There are two ways,
Use Composite Prefab, add EasyAR_ImageTracker-1 Prefab into the scene.
Use Primitive Prefab, add EasyAR Prefab into the scene, then add ImageTracker Prefab, VideoCameraDevice Prefab and RenderCamera Prefab as EasyAR children.
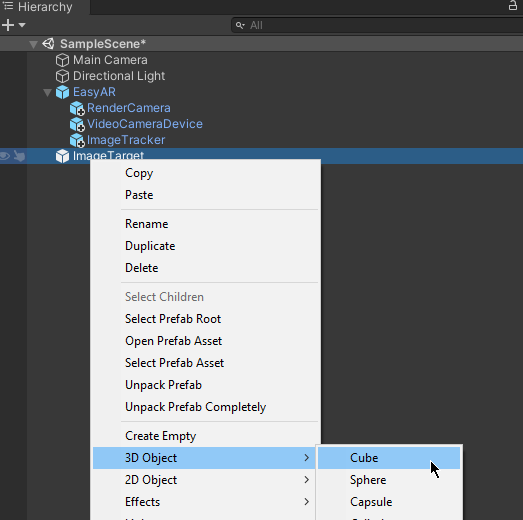
Add ImageTarget into the Scene
Add ImageTarget Prefab into the scene.
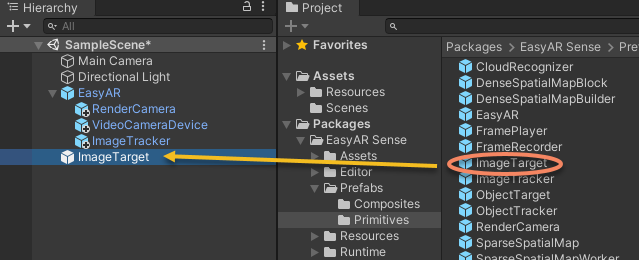
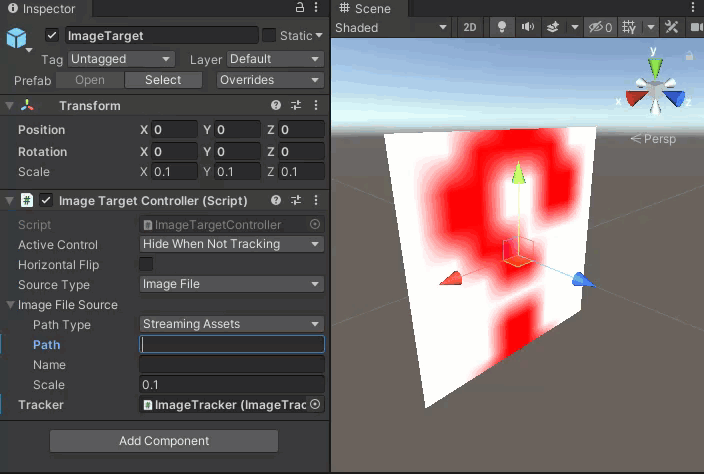
The ImageTarget in the scene will show as question mark.
Configure Camera
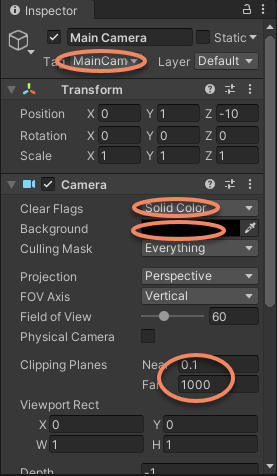
Tag: Set Camera Tag to MainCamera. If not set, the alternative is to set Assemble Mode of the EasyAR node to Manual, and manually set the Camera to it.
Clear Flags: Need to be Solid Color so that the camera image can be rendered normally. The camera image would not show when using Skybox.
Background: This is not a must but set the background to black would increase user experience before the camera opens or when switching different cameras.
Clipping Planes: Set according to the physical distance in real world. It is set to 0.1 (m) here so the object will not be clipped away when the camera device is near the object.
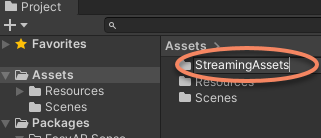
Add Image in StreamingAssets
Create StreamingAssets folder in Assets.
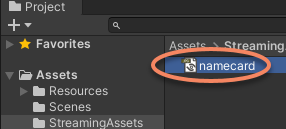
Drag the image for tracking into StreamingAssets. Here we use the name card image.
Configure ImageTarget
There are many ways to create ImageTarget, and here use one of them, to create target using StreamingAssets image.
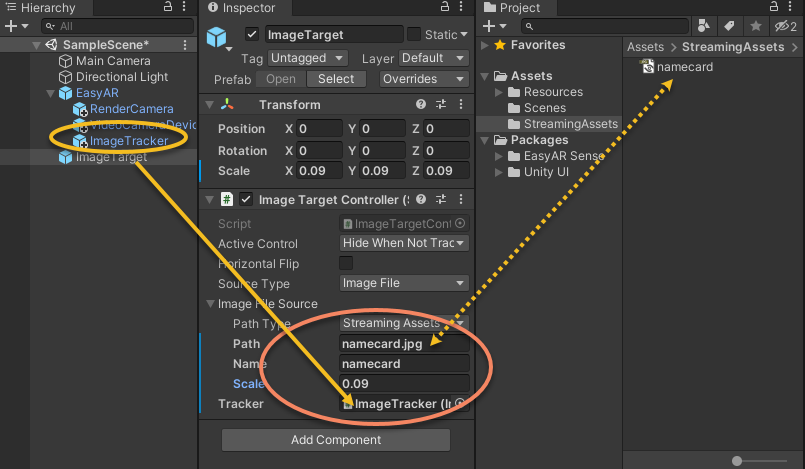
Source Type: Set to Image File here, so the ImageTarget will be created from image files.
Path Type: Set to StreamingAssets here, so the Path will use a path relative to StreamingAssets.
Path: Image path relative to StreamingAssets.
Name: Name of the target, choose a world easy to remember.
Scale: Set according to physical size of the image width in real world. Here the name card width is 9mm in real world, so it is set to 0.09 (m).
Tracker: The Tracker to load ImageTarget. It will be set to one of the ImageTrackers in the scene when add. It can also be changed after that.
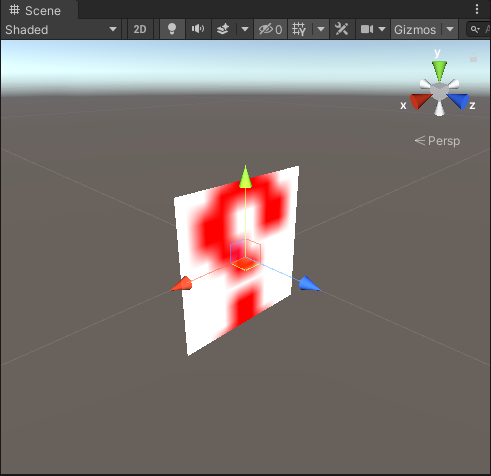
The ImageTarget in the scene will change while typing Path.
Add 3D Content which Follows ImageTarget
Add 3D object under ImageTarget node. Here we use a Cube as sample.
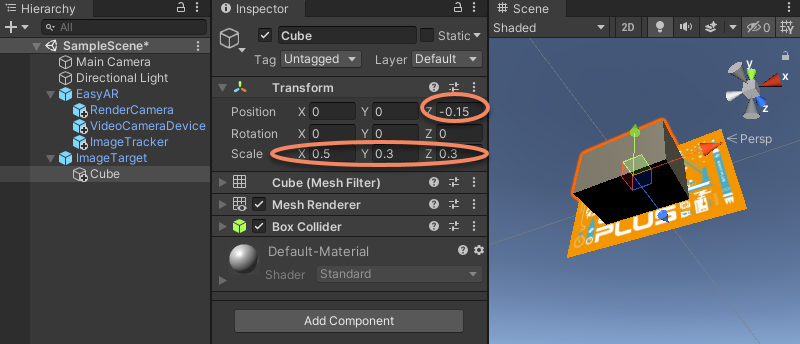
Scale: Transform can be set to fit the needs. Here we set scale to {0.5, 0.3, 0.3}.
Position: Transform can be set to fit the needs. Here we set z value of position to -0.3 / 2 = -0.15 so that the Cube bottom and image will be aligned.
Run in the Editor
If a camera is connected to the computer, then the project can run from Unity Editor after the above configurations.

Run on Android or iOS Devices
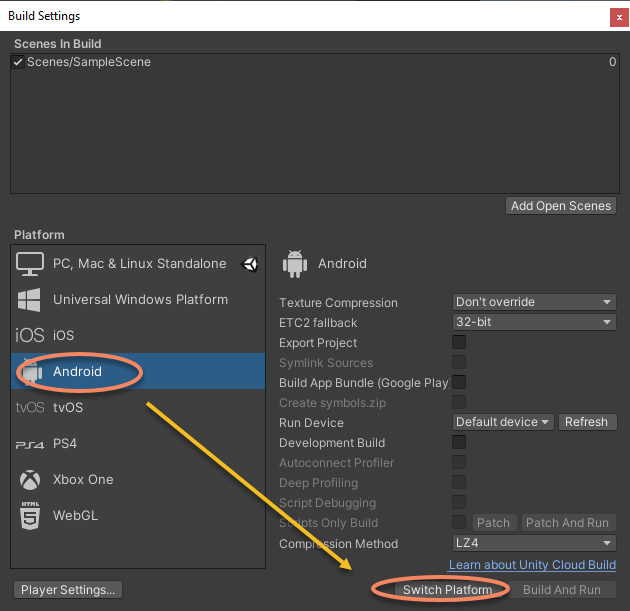
Add your scene into build settings,
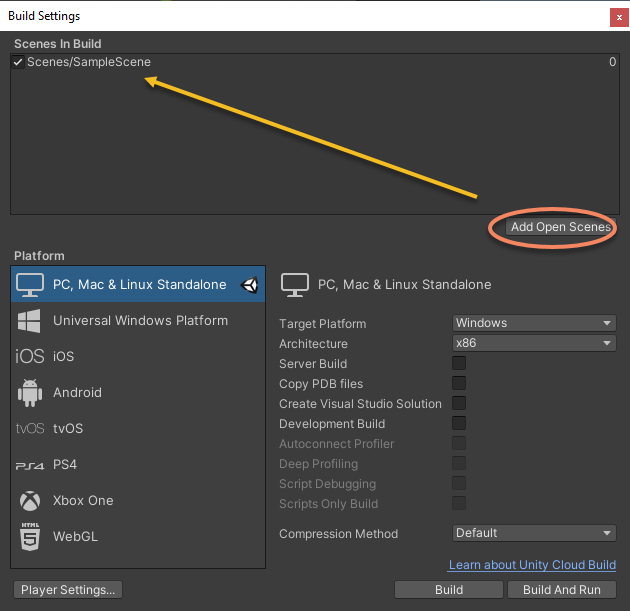
Configure the project according to Android Project Configuration or iOS Project Configuration, switch to target platform and then click on the Build or Build And Run button in Build Settings or use other alternatives will compile the project and install the binaries on the phone. Permissions should be granted on the phone when running.